Automation
The Automation area lets you react to what happens in your organization — someone signing in, a user enrolling in MFA, a new tenant being created — by running a flow you designed visually. It has three screens under the Automation section of the left menu: Flows / Graphs (where you build the logic), Event Hooks (where you connect an identity event to a flow), and Execution History (where you see what ran).
Flows / Graphs
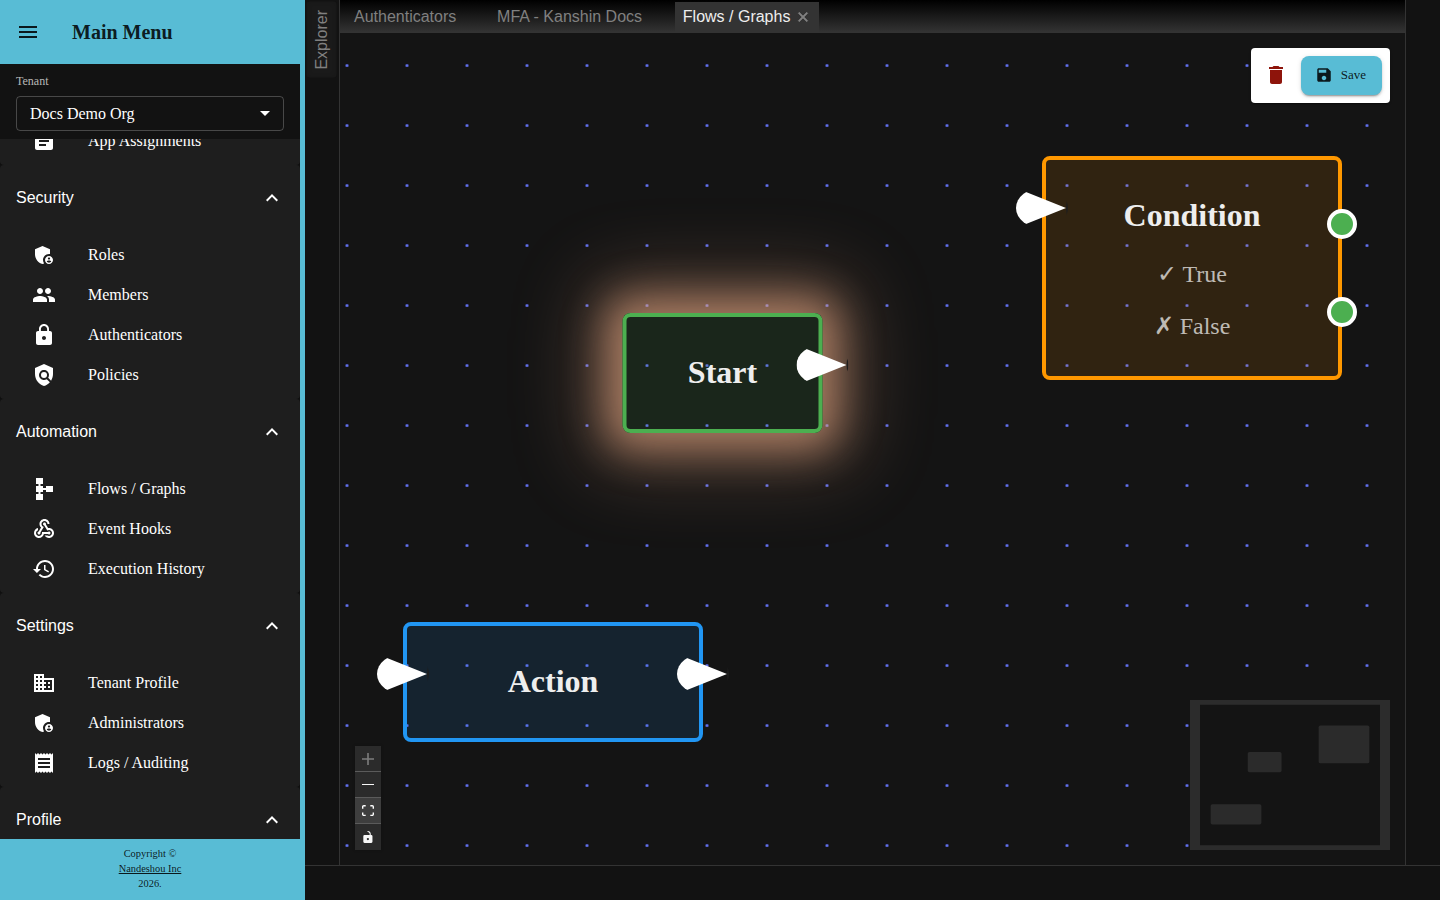
Open Flows / Graphs under Automation. It’s a visual, node-graph canvas: you drop nodes onto it and wire them together into the logic that runs when a flow is triggered. The canvas has a minimap and zoom/pan controls in the corners, and a small toolbar in the top-right with a Delete button and a Save button.
Add nodes
- Right-click an empty spot on the canvas and choose Add Node….
- The Add Node dialog opens with a search box and a tree of node types grouped by category. Search or browse, select a node, and click Add Node.
The node appears where you right-clicked. There are four node types:
| Node | Category | What it does |
|---|---|---|
| Start | Control | The entry point — where the flow begins. It has a single execution output. |
| End | Control | The exit point — marks the flow complete. It has a single execution input. |
| Condition | Logic | Branches the flow, with separate True and False outputs, so different things happen depending on the outcome. |
| Action | Actions | Performs a step (an MFA, authentication, or user-lifecycle action). It has one execution input and one output, so actions chain in sequence. |
Wire nodes together
Drag from a node’s output handle to another node’s input handle to connect them. Handles are typed and color-coded so you connect compatible points — hover a handle to see what it accepts or provides:
- White — execution flow (the control-flow path from one node to the next)
- Green — condition (a True/False branch out of a Condition node)
- Purple — user reference (a user identity passed between nodes)
- Orange — event data (the authentication or lifecycle event that started the flow)
Edit and tidy up
- Delete a node or connector by selecting it and pressing Delete or Backspace, or click the red Delete button in the top-right toolbar. Deleting a node also removes the connectors attached to it.
- A Save button sits in the top-right toolbar. Note that in the current console the canvas is a visual design and preview surface — saving a graph you’ve laid out here isn’t wired up yet, so use Flows / Graphs to design and understand a flow’s shape rather than to persist one.
Flows / Graphs is the design surface. You lay out and visualize the logic here. You decide when a flow runs on the Event Hooks screen, which points an identity event at a flow by its Target Flow ID — today those flow IDs come from flows provisioned on the server, not yet published from this canvas.
Event Hooks
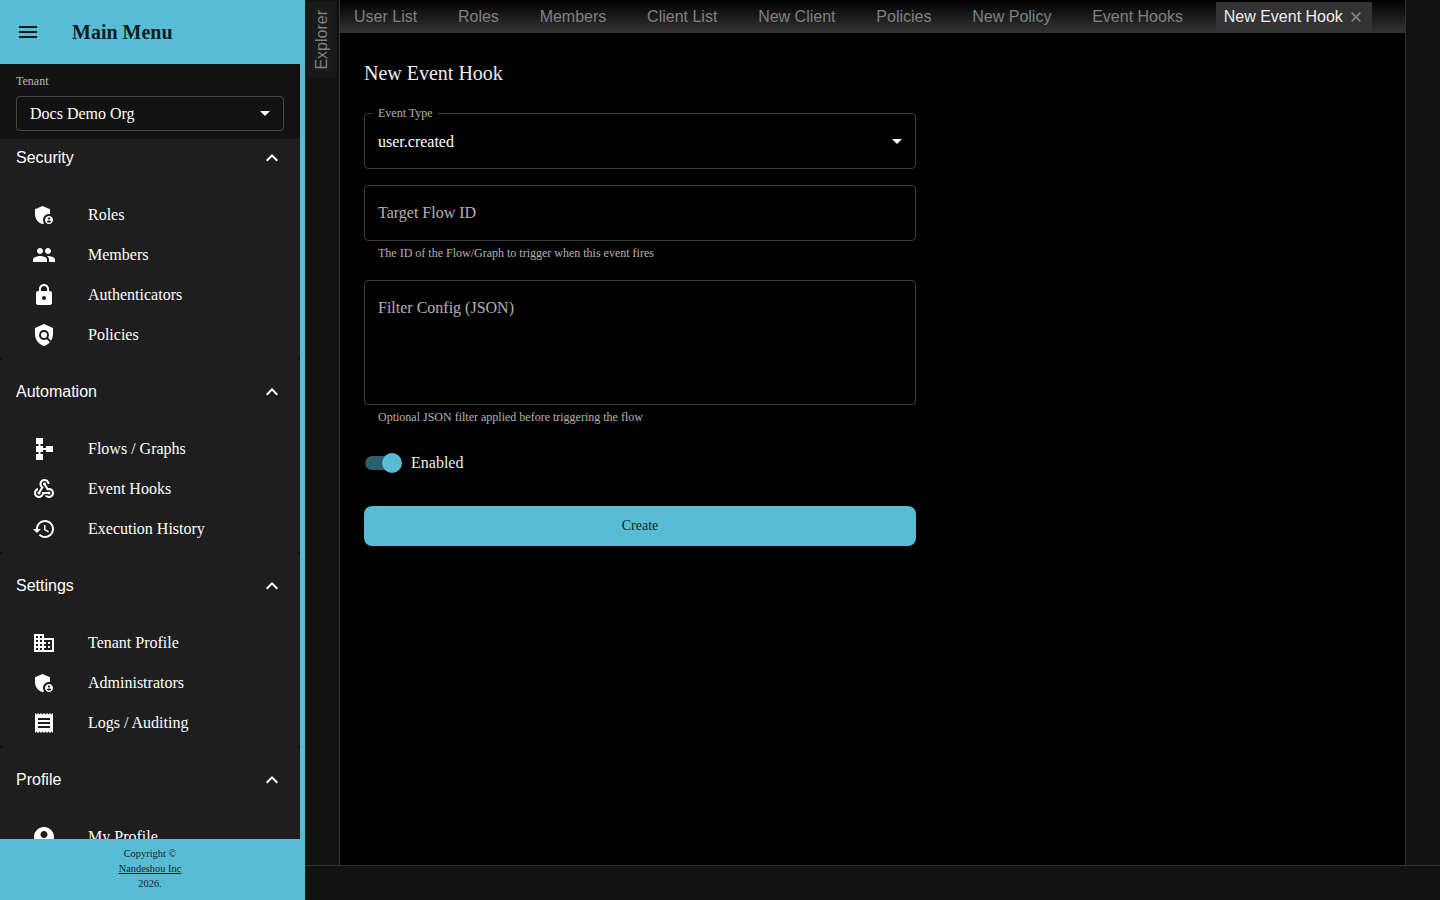
An event hook is the link between an identity event and a flow: “when this happens, run that flow.” Open Event Hooks under Automation. The grid lists each hook’s ID, Event Type, Target Flow ID, whether it’s Enabled, and its Created At. The toolbar has New, Edit, Delete, and Refresh.
Create an event hook
- Click New. The event-hook editor opens (titled New Event Hook).
- Fill in the fields:
- Event Type — the identity event that fires the hook. Choose one of:
user.created,user.login,user.mfa_enrolled,tenant.created, oroidc.client_authorized. - Target Flow ID — the ID of the flow to run when the event fires. This is required.
- Filter Config (JSON) — an optional JSON filter applied before the flow is triggered, so a hook can fire only in certain cases (for example
{"realmId": "default"}). Leave it empty to run for every matching event. - Enabled — a switch that turns the hook on or off without deleting it. New hooks start enabled.
- Event Type — the identity event that fires the hook. Choose one of:
- Click Create. You’ll see “Event hook created successfully.”
Edit or delete a hook
- Select a hook and click Edit (or double-click its row) to change any field, then Save.
- Select a hook and click Delete, then confirm in the Confirm Delete dialog.
- Toggle a hook off by opening it and turning Enabled off — the hook stays in the list but stops firing.
Execution History
Open Execution History under Automation to see the flows that have actually run. The grid shows each run’s:
- Name — the flow or job that ran
- Job Type and Source Type — what kind of run it was and what triggered it
- Status — a colored chip: completed (green), running (amber), or failed (red)
- Started and Completed — the run’s timestamps (Completed shows a dash while a run is still in progress)
Click Refresh to pull the latest runs. This page is a read-only record — it’s where you confirm that a hook fired and its flow finished, or spot a run that failed.
Good to know
- Nothing runs until you connect it. A flow you design in Flows / Graphs only executes when an Event Hook points an event at it and the hook is Enabled.
- The event types are a fixed list. Hooks fire on the five identity events in the Event Type dropdown — there’s no free-text event name.
- Disable rather than delete when you want to pause a hook temporarily — the Enabled switch keeps its configuration for later.
Related pages
- Multi-Factor Authentication
— the
user.mfa_enrolledevent comes from here - Single Sign-On
— the
user.loginandoidc.client_authorizedevents come from sign-in - Sessions, Audit & Security — the audit log alongside execution history