Documents
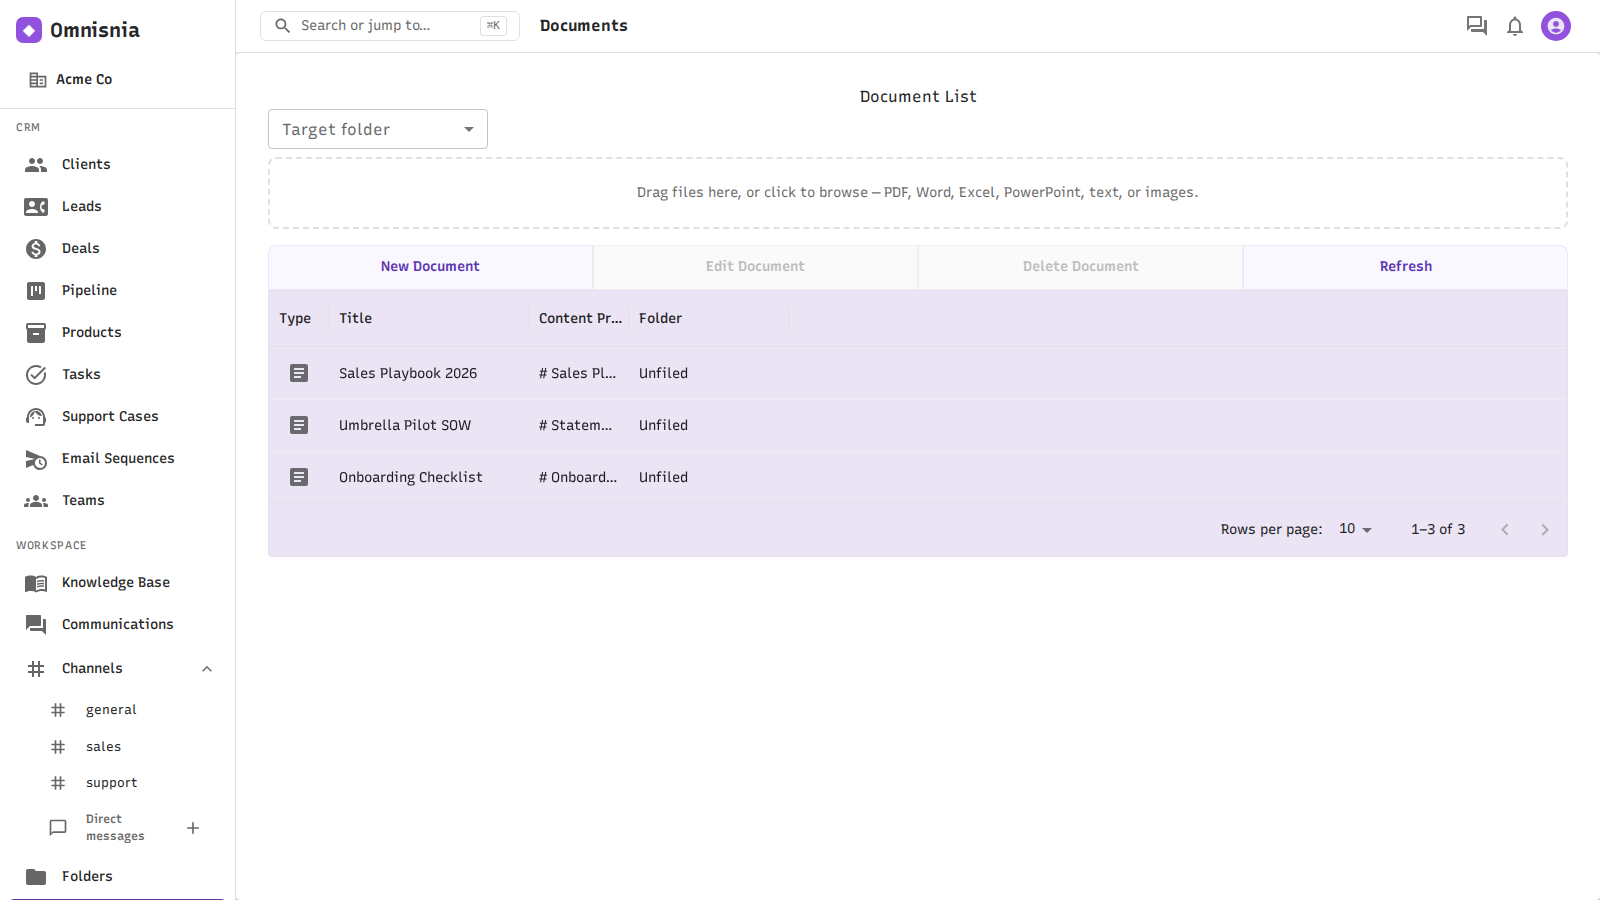
Omnisnia keeps your files as documents — with a preview, full version history, and search. This page shows you how to upload, organize, preview, and version them. You’ll find them under Documents in the left navigation (the Workspace group).
Upload documents
Uploading needs a folder to put the files in, so create one first if you have none (see Organize documents in folders ).
- In the left navigation, click Documents.
- At the top of the list, choose a Target folder from the dropdown.
- Drag files onto the drop area (“Drag files here, or click to browse…”), or click it to pick files.
- Watch the “Adding… n/total” progress; when it finishes you’ll see a summary like “3 added · 0 failed · 1 skipped (unsupported type).”
Each file becomes its own document, titled with the file name. Supported types include PDF, Word (.docx), Excel (.xlsx), PowerPoint (.pptx), text and Markdown, CSV/TSV, HTML, JSON/XML/YAML, and common images (PNG, JPG, GIF, WebP, SVG). Other types are skipped. The size limit per file is 25 MB.
You can also upload from inside a single document: open it and click Upload file.
Preview a document
Open a document (select its row and click Edit Document). Omnisnia previews the current version inline based on its type:
- Images render directly.
- PDF and Office files (Word/Excel/PowerPoint) render in an inline viewer — Office files are converted to PDF for preview on the server.
- CSV/TSV render as a table; Markdown renders formatted; other text shows as plain text.
- Anything that can’t be previewed offers a Download button instead.
Edit a document’s text
In the document editor you can set the Title, choose its Folder, and edit the Content for text documents. Click Save — you’ll see “Saved — added a new text version,” because each save is kept as a version (see below).
Work with version history
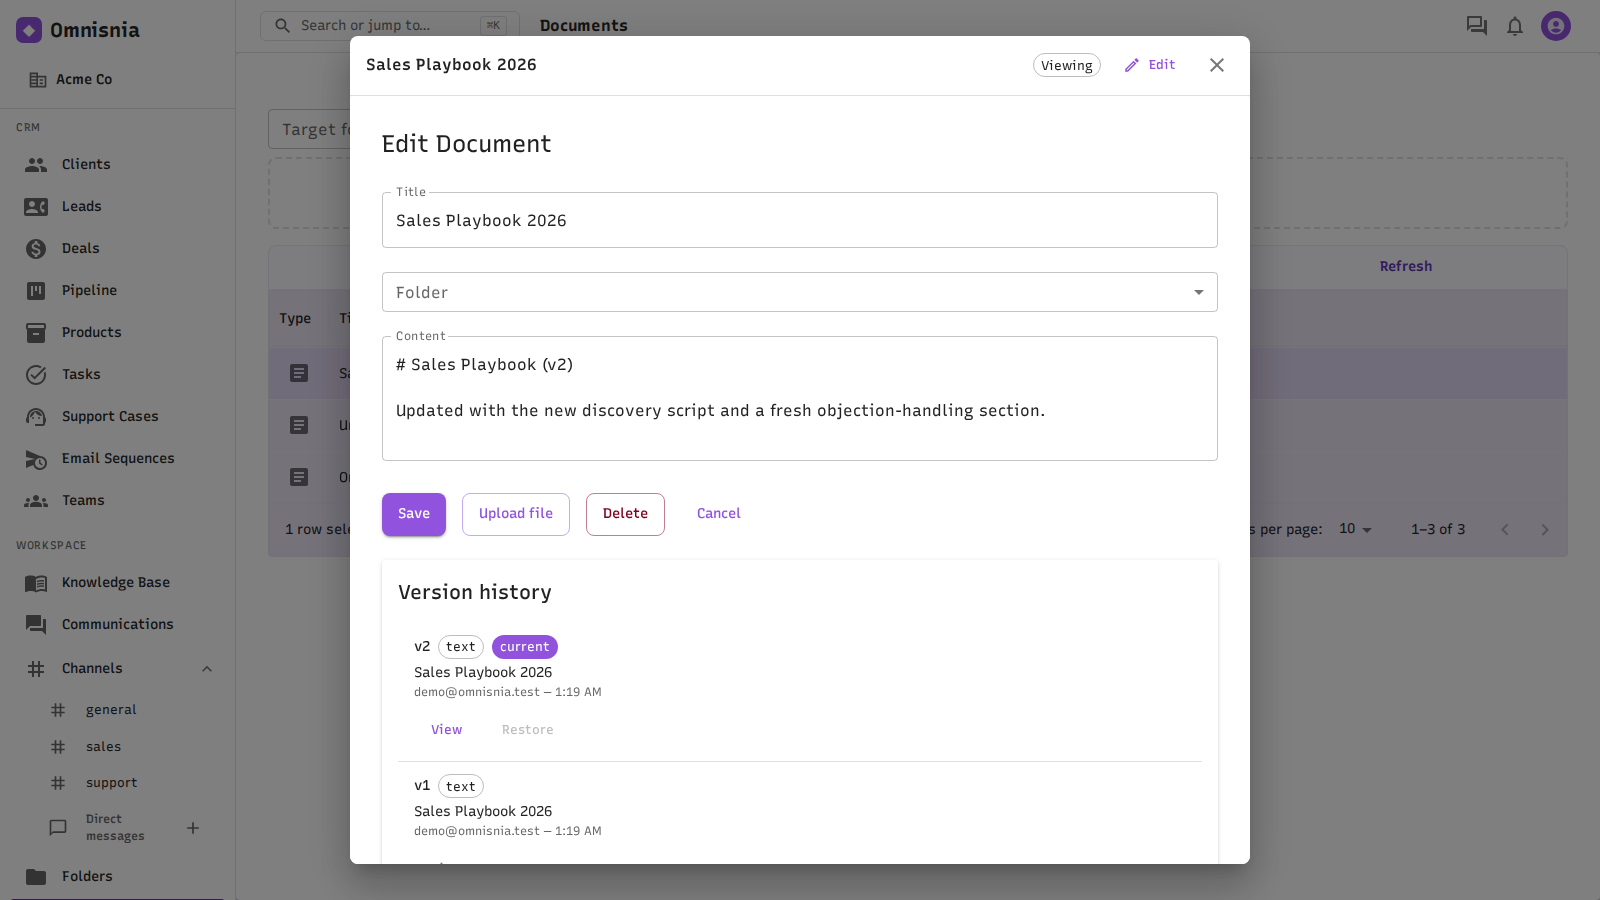
Every change is kept as a version. Open a document and look at the Version history panel on the right (newest first). Each entry shows its number (v3), a text or file chip, a current chip on the latest, and who changed it, when.
- View a text version (read-only), or Download a file version.
- Restore an earlier version — this appends a copy of it as the newest version (it never discards history). You’ll see “Restored v2 as the newest version.”
Organize documents in folders
Documents live in folders. To create one, open the Folders area, click New Folder, enter a Folder Name, and click Save. Then set a document’s folder from the Target folder dropdown when uploading, or from the Folder dropdown in the document editor.
Deleting a folder deletes its documents. Removing a folder now cascades — the documents inside it are deleted too. You’ll get a confirmation naming how many documents will go with it, so check the count before you confirm.
Heads-up: a fresh organization starts with no folders, and there isn’t yet a Folders entry in the main navigation — this is a known gap being addressed. If you can’t reach Folders and have no folder to upload into, contact your administrator.
Delete a document
On the Documents list, select the document’s row and click Delete Document. (Use the list’s Delete button — the Delete/Cancel buttons inside the document editor aren’t wired up yet.)
Related pages
- Knowledge Base — browse and search across all your documents
- Channels & Teams — put document folders in scope for Omni
- Omni Assistant — ask questions grounded in your documents